The Boho Baker’s No Knead Chocolate Brioche
Ingredients
- 372g Booths plain flour
- 8g instant yeast
- 44g golden caster sug
- 186g eggs, approx 3 large
- 63g Booths whole milk
- 167g unsalted butter
- FOR THE FILLING
- 60g unsalted butter
- 30g golden caster sugar
- 30g cocoa powder
- 10g honey
- 1tsp vanilla extract
Instructions
 The Boho Baker describes herself as “Baker. Writer. Forager. Wanderer. Organic ingredient and edible floral Enthusiast. Member of the Guild of Food Writers.” Very local to our HQ in Preston, she’s kindly agreed to do a series of recipes for us, celebrating the best of our local produce. Follow her on instagram @thebohobaker
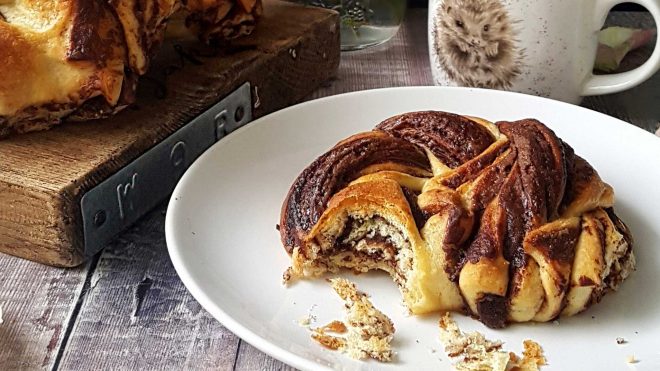
My Chocolate Swirl Brioche Rolls are ideal for bakers who are comfortable with cake but petrified of proofing. Perfect for bread baking novices and fully experienced bakers alike, there isn’t even any kneading involved: just mix, fold, chill, shape, and you’re good to go.
Equipment required: Stand mixer fitted with a dough hook
Method
- Start the brioche dough by placing the flour, yeast, sugar, salt, eggs, and milk into the bowl of your stand mixer. Using a dough hook, mix on a low speed for 5 minutes, or until well combined. Dice up the butter into small cubes and drop them into the mixture one at a time, only adding more when the previous cube has been fully integrated into the dough (this can take up to ten minutes in total). Once all the butter has been integrated, leave to mix on a low speed for a further ten minutes.
- Lightly dust your hands and worktop with flour and remove the dough from the bowl. Flatten the dough lightly with your hands, then fold the left side over to the right, the right side over to the left, then the top to the bottom and the bottom to the top. Grease a bowl with a little oil and place the dough inside. Cover with clingfilm and leave to rise in a warm place for an hour.
- After an hour has passed, remove the dough from the bowl and repeat the folding process again. Pop the dough back in the bowl, cover with clingfilm, and leave in the fridge for 4- 12 hours (preferable overnight).
- About 30 minutes before you are due to remove the dough from the fridge, prepare the filling by creaming the butter and sugar together until pale and fluffy. Add the cocoa, vanilla extract and honey, and continue to mix until well combined.
- Remove the dough from the fridge and cut into four equal pieces. Keep one piece out and place the rest back in the fridge. It is important that you keep the dough as cold as possible during this process, so it’s best not to work next to or over an oven.
- Dust your worktop with flour and roll out the first piece of dough into a large rectangle, slightly slimmer than a pound coin.
- Spoon a quarter of the filling onto the dough and gently spread with a spatula, being careful not to pull too hard. When the dough sheet is covered, starting from one of the long sides of the rectangle, roll it up as tightly as possible. Keeping your palms flat and even, gently give the dough an extra roll to lengthen to about 40-50cm. Cut in half to create two 20-25cm rolls.
- Take a large knife and slice each roll lengthways, leaving the top 2cm uncut. This should leave you with a “V” shape of dough with stripes of chocolate running through the inner seams. Take the right piece of the dough and place it over the left. Place the “new” right over the left again, and repeat once or twice more, or until you run out of dough. Dampen the ends with a little water and press them together to create a wreath. Repeat with the remaining three pieces of dough until you have 8 brioche rolls.
- Place the rolls on a baking sheet lined with greaseproof paper, cover with clingfilm and leave to proof in a warm, dry place for one hour.
- 15 minutes before the brioche has finished rising, preheat your oven to 165C/Gas mark 3. Lightly brush the tops of the rolls with a little beaten egg, then bake in the oven for 20-25 minutes. These are best enjoyed straight from the oven but keep well for approximately two days.
Hints/Tips/Troubleshooting:
- You need to weigh your eggs after they’ve been cracked open, rather than before. Crack the eggs into a small dish, give them a quick whisk and then weigh out what you need.
- If your oven doesn’t have a proofing drawer but does have a separate grill like mine, you can put your oven on slow cook/gas mark 1 and place the dough in the separate grill compartment above. The grill drawer will be just warm enough to turbo charge the yeast and provide the perfect proof.