The Boho Baker’s Blog: Pretty Perfect Pie Crusts
Written on January 25th, 2019
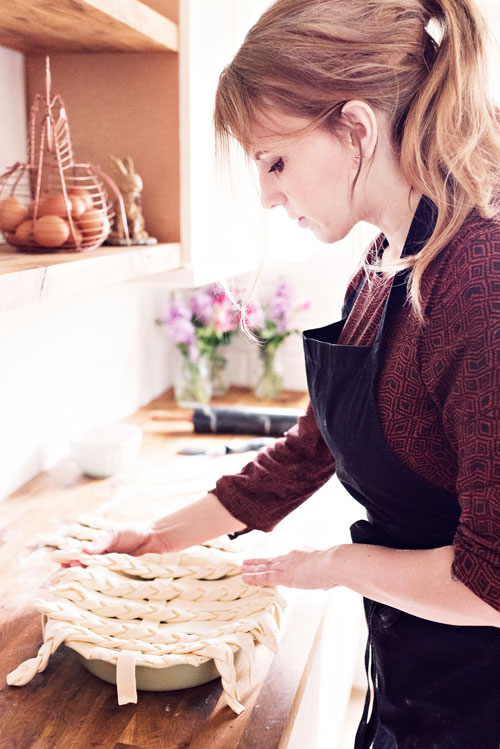
 The Boho Baker describes herself as “Baker. Writer. Forager. Wanderer. Organic ingredient and edible floral Enthusiast. Member of the Guild of Food Writers.” Very local to our HQ in Preston, she’s our fabulous professional guest recipe writer, and champion of celebrating the best of our local produce. We’re very happy to introduce her new guest blog slot, bringing you her best foodie tips. Follow her on instagram @thebohobaker
There’s something both relaxing and satisfying about putting together a pie and crowning it with a pretty pie crust. Whilst I’m a huge fan of pies topped with a golden plume of puff pastry, flaky and crisp, shortcrust pastry is equally delicious yet versatile enough to be braided, moulded and embossed into a multitude of pretty designs. Be it sweet of savoury, there’s no pie that can’t be improved by a few creative tweaks.
A quick search for pie crust images on Instagram will bring up scores of beautiful, intricate bakes. But guess what? The majority are easily achievable, you just need the insider tips and the right tools. One of the reasons I love making decorative pie crusts so much is because a simple utensil such as a leaf shaped cookie cutter can create a seriously impressive pie. Once you’ve got your basic recipe right, all you need are a couple of simple tools and you’re guaranteed beautiful results every single time.
The most wonderful thing about shortcrust pastry is that nobody has tried to “mess” with it. The internet is saturated with food bloggers trying to add their own unique twist to classic recipes, but shortcrust pastry is one of the blessed few that nobody tries to change and modernise. I’ve been using the same recipe for the best part of 17 years so I’ve no doubt it will work for you too:
Simple Shortcrust Recipe
Preparation time: 20 minutes
Makes 490g (enough for one 25cm wide pie)
Ingredients:
375g Plain Flour
165g Unsalted Butter, cubed
115ml Iced water
Pinch of salt
Method:
- Put the flour, salt and butter in a large bowl. Rub the butter into the flour using the tips of your fingers until the mixture resembles coarse breadcrumbs. Of course, you’re welcome to use a food processor if you prefer.
- Add the water a little at a time whilst mixing the pastry mix with a knife. Cease adding water when the dough begins to bind together.
- Wrap the dough in clingfilm and pop it in the refrigerator for at least 15 minutes. You can freeze any unused dough for up to 3 months, just make sure it is well wrapped.
How simple was that?! Once your pastry is ready, just make sure that you roll it out on a well-floured surface with no lumps or bumps. I use a ceramic rolling pin, any will do, but if you use a wooden one you may find you need to dust a little flour on that too to prevent the pastry sticking. Now the easiest part is over (not that it gets particularly difficult afterwards),
here are my five golden rules to get the best out of your pastry:
- Make sure your pastry is well chilled: Warm pastry tends to shrink and lose elasticity as you work with it. I recommend having a zip lock bag on hand to throw the trimmings in and pop back into the fridge whilst you’re working on other pieces. It will make your life a lot easier, particularly if you’re working on a more intricate crust.
- Don’t overwork the pastry mix:Don’t worry about eradicating every visible piece of butter in your dough. Overworking the mixture will result in a greasy pastry that shrinks in the oven. Plus, those teeny blobs of butter you may spot in your dough will help create steam within the walls of the pastry whilst cooking, resulting in delicious pockets of flakiness.
- Leave a little excess: When lining my pie dish, I cut the pastry approximately 2cm over the edge, then fold the excess underneath itself to create a flush edge. The little extra pastry will help the pie retain its shape should it shrink in the oven.
- Chill and chill again:Once my pie is filled and the crust is in place, I chill it in the oven for a further ten minutes. The colder the pastry is when it hits the oven, the better the result post-bake.
- Don’t be afraid to season your pastry:I always add a generous grinding of black pepper to my pastry if I’m making steak pie, or a sprinkling of cinnamon and nutmeg to fruit pies. This small nuance of flavour can make a big difference to your finished bake.
So, now you’ve got your fool proof pastry ready and you’ve lined your pie dish, it’s time to crank it up a notch and pull together a show stopping pie topper. It doesn’t take much to throw together a pretty pie crust and it’s likely you have everything you need in your kitchen already. If you’re a keen baker, I strongly recommend cultivating a small collection of sugarcraft cutters for your pies and pastries. I prefer organic shapes like leaves and flowers, but polka dots, diamonds, and geometric shapes also look highly effective. If you’re baking an open topped pie or don’t have the time to decorate a full crust, a halo of pastry shapes around the edges is highly effective and always looks stunning.
Here are three of my favourite techniques for you to try. If you don’t feel ready for basket weaving just yet then fear not, we can cheat it out with a little embossing. There’s something for everyone here, no matter what your confidence level.

For all of these techniques, begin by rolling out your pastry to the thickness of a £1 coin on a lightly dusted worktop.
Lace embossing:

1: Place a piece of clean lace over the top of the pastry and run a rolling pin firmly over the top.
2: Use the excess trimmings to cut out some small flower shapes, sticking them to the edge with a little egg wash. Slide a large knife underneath and place on top of your filled pie.
Easy Weave:

1:Press a fork into the bottom left corner of the pastry. Turn 90 degrees and repeat the the right of the first indentation.
2: Continue to press alternating indentations until you have a basket weave effect.
3: Use the excess pastry to make some leaves to cover the edges. I also like to roll out some little dots to pin between the joins on the basket weave. Slide a large knife underneath and place on top of your filled pie.
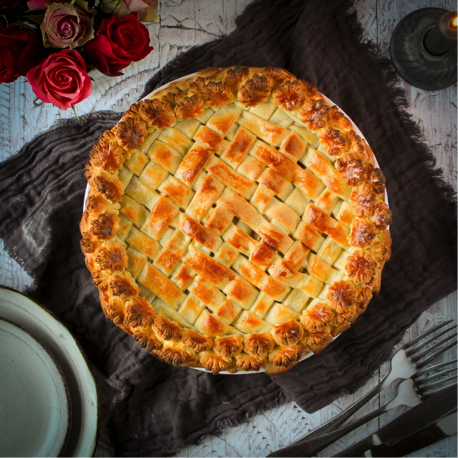
Basket Weave:
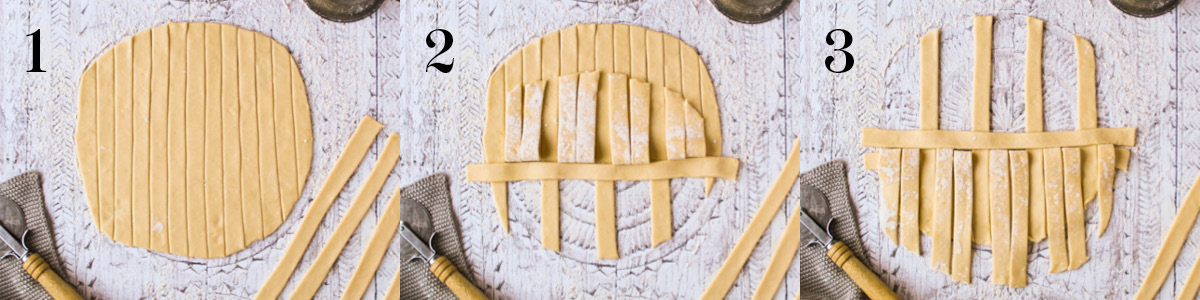
1: Roll out your pastry and cut into finger width strips. Cut out some extra strips to weave into the design.
2: Starting on the left-hand side, leave the first strip down. Lift up the following two and leave the next one (which should be your fourth strip) down. Repeat across the row. Place a strip of pastry over the flat pieces and return all the “lifted” pieces back to their original position.
3: Starting on the left again, bring down the first two strips, leaving the third up. Bring down the fourth and fifth, leaving down the sixth. Repeat across the row before adding a strip of pastry across the flat pieces and returning the folded pieces back to their original position.
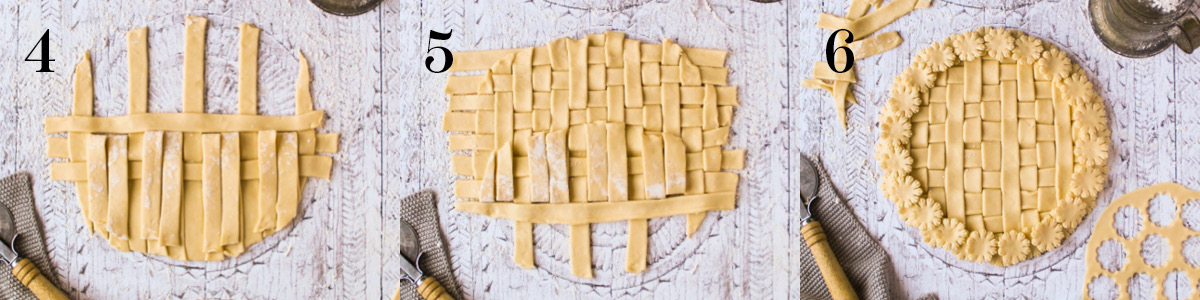
4: Carrying on up the pie, starting on the left-hand side, leave the first strip down and fold back the second and third. Leave the fourth down, and fold back the fifth and sixth etc. You want to be alternating between leaving the first strip up and then the first strip down. The sequence always remains the same as you work across the pie, with one strip up, two strips down, and repeat.
5: Once you have reached the top of the pie, return to the starting point and work your way down to the base.
6: Trim off the edges, using any excess to roll out some flowers to create a pretty crust. Place on top of your filled pie and brush with egg wash.
If you’ve not made many pies before, here is my hearty chicken & bacon pie recipe which never fails to please. Feel free to add any extra vegetables you have lying around the kitchen, the sauce can be altered to accommodate as much additional filling as you wish. Best served warm with a creamy dollop of mash on the side.
 Chicken & Bacon Pie:
Ingredients:
1 batch shortcrust pastry (as per the above recipe)
8 chicken thighs
300g bacon lardons
2 leeks, chopped
2 carrots, chopped
2 pints whole milk
2 bay leaves
1tsp black peppercorns
2tbsp plain flour
Method:
- Preheat your oven to 200C/180C (fan)/ Gas mark 6.
- Place the chicken thighs in the bottom of a heavy based pan. Cover with milk, add the peppercorns and bay leaves, and bring to the boil. Leave to simmer for 25 minutes.
- Fry the bacon lardons until slightly crisp. Pop the bacon into a separate bowl, using the same pan to fry the leeks and carrots in the residual bacon fat. Remove the pan from the heat.
- When the chicken thighs have cooked, remove them from the pan but do not discard the liquid. Remove and discard the chicken skin before slicing off and chopping up the meat.
- Add the bacon lardons and chopped chicken to the pan with the cooked vegetables. Sprinkle the plain flour over the top and add two ladles of the milk used to cook the chicken. Return the pan to the heat and continue to stir until a sauce has formed. If the sauce is a little thick, add a little more milk. If it is too thin, add some more flour. If you want to add any extra vegetables, just adjust the milk and flour quantities until you have the right amount of sauce. There will be more than enough milk to spare.
- Scoop the filling into a pie dish that has been lined with pastry. Add your decorative crust and brush with a little egg wash before baking in the oven for 25 minutes.
- Serve with a dollop of mash and a side of vegetables. Keep any uneaten pie in the refrigerator and consume within 3 days.
That’s it! I hope my tips and tricks will give you the confidence to have a go at making a pretty pie of your own. Just remember to keep your pastry cold, always use an egg wash, and let your imagination run wild. I would love to see your pastry creations, so please remember to tag us in any social media pictures of your beautiful bakes.
Happy baking!
What burning foodie questions do you have for The Boho Baker? Fill in the form below and your question might get answered next time!
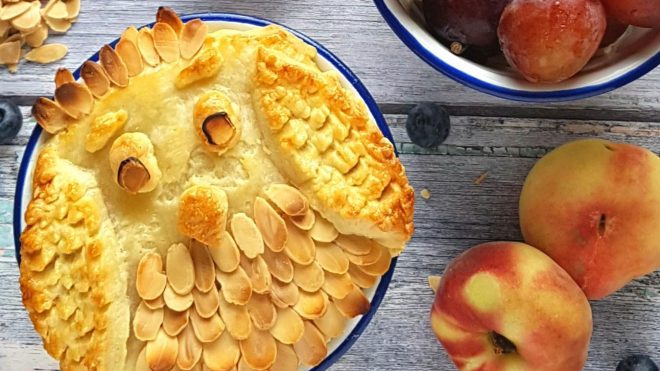
You can find the recipe for The Boho Baker’s Owl Pie recipe featured at the top of the blog here (opens in a new window).
Find your nearest Booths: